Share this
by 3devo on May 18, 2026 4:09:36 PM

Welcome back! On the first step of our PEEK journey, we started the preparations needed to transition from PLA to PEEK within our filament maker. In addition, we’ve begun our data log, so we don’t reset the machine at a crucial stage.
For part two, we’ll be focusing on finding the correct settings. From the transitional stages of removing the PLA, using our DevoClean MidTemp, and HighTemp, and finally, the transition we’re all here for, PEEK.
So. Let’s get started!
Transitioning from PLA to Midtemp
We want to create a smooth and sharp transition between our PLA and MidTemp and to do that, we need to remove all the PLA pellets from our hopper. By doing this, we will see the exact point where PLA has stopped extruding from the filament maker and where the MidTemp begins.
There are two ways we can do this:
- Wait until the hopper is empty and the screw is visible; this can take some time.
- Vacuum the hopper; if you’re short on time or impatient, this is the way to go.
Now that it’s empty, we can pour in our MidTemp. We started by pouring in 50g and adding small batches until the PLA was entirely out of our filament maker. You’ll be able to see the difference between the two when the output is opaque and looks like the pellets. Once the PLA is out, we’ll continue to add our MidTemp to start increasing the heat of our filament maker.
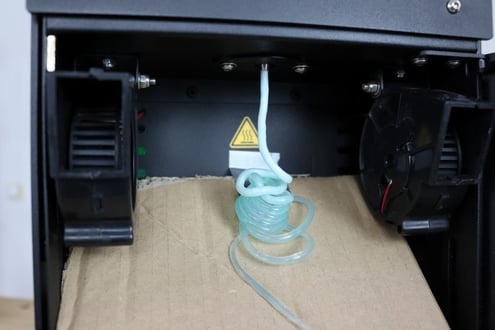
Here you can see the clear distinction between the previous material extruded (not PEEK) and our DevoClean MidTemp
Increasing the Temperatures of the Filament Maker
Now that our output is only DevoClean MidTemp, we’ll increase our heaters to 300C, as it’s the overlap between MidTemp and HighTemp. It can take some time for the temperatures to rise, so in the meantime, it’s crucial we keep filling the hopper – don’t overfill it as it would be a waste of your material. Instead, pour in small batches bit by bit.
If there is any MidTemp remaining in the hopper once the heaters are all on 300C, vacuum clean them away or wait for them to go through. You can then add your HighTemp.
The process is the same as the transition between PLA and MidTemp, continue adding small portions (50g) of HighTemp.
We would like to point out that we are using a fume hood during this PEEK extrusion process. The reason is that some plastics when they heat, release toxic fumes. While the amount that would come out during the process isn’t deadly, we always advise keeping any toxic fumes far from you and taking advantage of a fume hood or other concentrated ventilation systems.
Continuing with our rule of thumb of the output looking like the pellets, we have pure HighTemp coming out of our filament extruder; it is whiter than MidTemp and smoother. We can now increase the temperatures to 400°C, which is the last transitioning step before adding in our PEEK pellets and creating PEEK filament.
When we increased the heat, we could see a difference in the appearance of our HighTemp. It became more yellow (nothing to be concerned about), and we could see some impurities within it. There are some burnt particles throughout, which is a good sign! It means that HighTemp is doing its job of purging the machine of any impurities, thanks to its glass fiber content. We’re going to continue pouring in our HighTemp not only until we reach 400°C but until anything sitting in the filament maker is out because we want to start our PEEK extrusion with a clean machine.
Any impurities, no matter how big or small, can impact the quality of our final PEEK filament, and we don’t want to risk that.
The Final Transition Before PEEK Filament
As excited as you are, and we are to extrude PEEK filament, we can’t be too hasty. We want to make sure the machine and its heaters have stabilized at the high temperature we need it to be. Even if the temperatures have just reached 400°C, give it another minute or two to adjust and stabilize (you can also see this on your data log). We want to be sure the temperatures are stabilized because PEEK can crystalize quickly and result in a blockage within the machine or at the nozzle.
Now that the heaters are stable, we’re going to do what we’ve done before and vacuum out the remaining HighTemp from the hopper. We’re then going to continue by adding a small portion of PEEK (50g) and do this bit by bit until we get a pure PEEK output. As mentioned in our last blog post, you can time this part by having your PEEK dried when you put it in your filament maker.
You can tell when pure PEEK extrudes by looking at the texture and color. The surface will look rough and grainy if it’s still mixed with DevoClean HighTemp. Once it’s pure PEEK, you’ll notice as soon as it comes out of the nozzle and is still in its molten state, it is pretty translucent. Once it cools down and crystallizes, it becomes an opaque, light brown color.
Before spooling, we want to make sure the PEEK is smoother. A reason why your PEEK may still look a little rough even after having purged the HighTemp could be because of a cold nozzle. It’s essential to keep in mind that the PID controlling system learns over time to adjust temperatures, so when you place your PEEK pellets in the hopper, you may disturb the steady-state the PID system had found regarding the temperatures of the heaters. To help the PEEK become smoother, we’ll increase the last heater by 5 degrees, so it’s at 405°C.
If you gently pull on the output, you’ll be able to see that it has good strength and viscosity overall, but for the things we can’t see with our naked eye, the tolerance, we’re going to place our filament inside the sensor and between the two puller wheels.
Final Step: Fine-tuning and Spooling
The data log will continue to show you real-time numbers of the filament thickness and show you how good the tolerance is.
Now that we’ve found the proper settings for our PEEK filament and the sensor has adjusted the filament, we can move on to our last step!
Tune in for our next blog post, where we’ll finetune our filament and finally be able to spool it!