Share this
by 3devo on May 18, 2026 4:01:24 PM
Did you know that the empty PolyStyrene (PS) spools from your 3D printing projects are actually hidden treasures waiting to be unlocked?
3D printing filament spools are the unsung heroes of the 3D printing ecosystem, especially the PolyStyrene (PS) spools that we primarily use at 3devo. These spools not only hold the filament but also represent an untapped goldmine for recycling. From support structures to failed prints, there's a lot of material that can be turned back into valuable filament. But have you ever stopped to think about the spools themselves? They often end up as waste, and that's what we're tackling head-on. We've found that these PS spools can be transformed into high-quality filament, opening up a whole new avenue for recycling.
Embark on this technical journey with us as we navigate the complexities of turning empty PS spools into reusable filament and, eventually, 3D-printed items. We'll cover every step of the process, from shredding and filament-making to troubleshooting and printing. Get ready to absorb in just 5-15 minutes what took us several days of rigorous experimentation. So, buckle up and dive into this exciting adventure of giving new life to what would otherwise be waste.
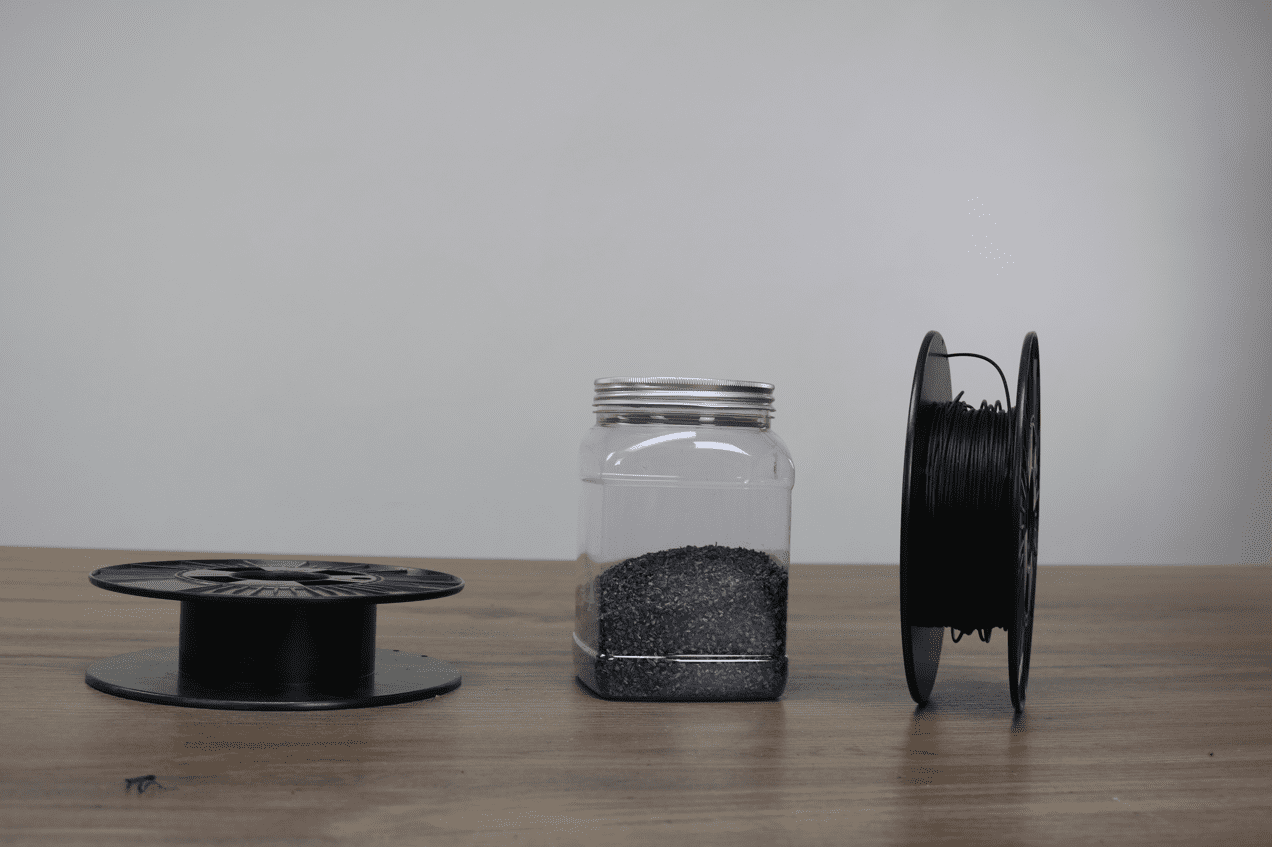
3D printing filament spools are like the unsung heroes of the 3D printing world. They come in a variety of materials, including cardboard, metal, polypropylene, and PolyStyrene (PS). Each material has its own set of advantages and disadvantages, but for the purpose of this guide, we're zeroing in on PS spools. These are the spools we predominantly use at 3devo, and they're abundant wherever 3D printing filament is used. Surprisingly, these omnipresent spools can be transformed into filament of exceptional quality. So, let's embark on a journey to create a "spool of spools."
It's important to note that not all PS is created equal, and understanding the nuances is crucial for successful recycling. Solid PS, the material from which these spools are made, is a thermoplastic polymer known for its rigidity, excellent electrical insulation, and ease of injection molding. This sets it apart from Styrofoam, which is a type of expanded PS. Styrofoam is filled with air and has a foam-like structure, making it unsuitable for recycling due to its high air content. In contrast, solid PS offers a range of mechanical properties, including strength and durability, that make it an intriguing candidate for our recycling project. It's this form of PS that we've focused on to unlock its potential for a second life as high-quality filament.
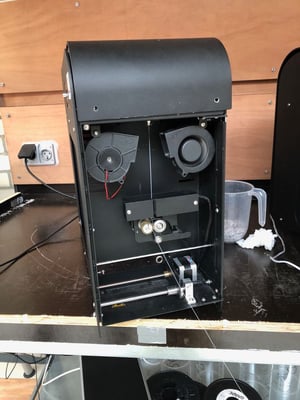
Now, let's talk about the elephant in the room: the injection molding process. PS spools are usually injection-molded, a process that, in theory, makes them unsuitable for extrusion. Why? Because the fluidity of the material used in injection molding is different from that used in extrusion. Injection-molded grades are designed to be more fluid so they can quickly and accurately fill fine molds. Extrusion grades, however, are more viscous, allowing the filament to hold its shape and withstand the tension of spooling.
%20(1).png?width=800&height=640&name=silver-extruder-1%20-%20instasize%20(1)%20(1).png)
On paper, it looks like you can't use this kind of PS for extrusion. But we like a challenge! We've figured out how to do it, and we're excited to share that with you. So, even if something seems like it won't work, sometimes you can find a way.
Preparation can be divided into sub-steps. No detail should be overlooked since the smallest mistake might result in the clogging of the 3D printer.
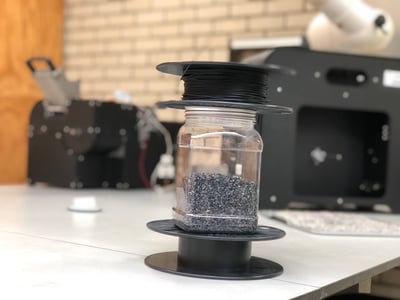
The moment a spool runs out, it should be immediately stored in a clean, sealed container. The aim is to prevent any contamination from dust and foreign particles. Contaminants like plastic and non-plastic particles can severely compromise the recycling process. For instance, different polymers like PLA or ABS won't melt properly and could cause issues. Even spools from different brands or other grades of PS can introduce unwanted variability. The goal is straightforward: store only one specific, controlled type of PS spools to maintain material consistency.
Cleaning is a critical step that should not be overlooked. Stickers, glue, and other impurities must be completely removed before the shredding process begins. If you skip this step, you'll find it nearly impossible to remove these impurities later, especially glue residues. These residues can burn inside the barrel of the Filament Maker, leading to a clogged 3D printer. It's essential to use cleaning agents that are compatible with PS. For example, acetone should be avoided as it dissolves PS. Ethanol is also not recommended. Stick to soapy water for best results. After cleaning, make sure the spools are stored in a way that prevents further contamination.
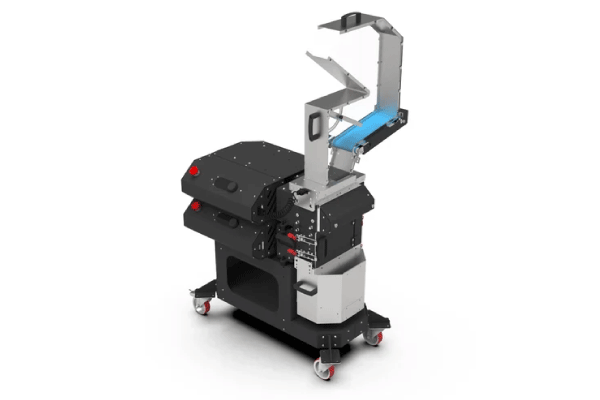
Pre-chopping and Shredding with the GP20 Plastic Shredder
Not all shredders can handle full-sized spools, especially those designed for laboratory-scale operations. Pre-chopping the spools into smaller pieces (around 7-10cm) is often necessary. Our GP20 Hybrid Shredder is particularly effective for this, reducing the pre-chopped spools first to 8mm and then to 3.5mm particles. It's vital that all particles are uniformly smaller than 4mm, the maximum input size for the Filament Maker. The GP20 Hybrid accomplishes both shredding and granulating in one seamless step.
While many polymers are hygroscopic and absorb moisture, PS is an exception. It's hydrophobic, meaning it doesn't absorb significant amounts of moisture. However, any water introduced during the cleaning process should be allowed to evaporate in a "normal" environment before proceeding to the shredding step.
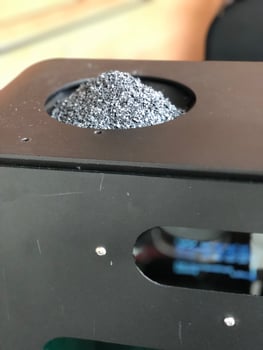
After following these detailed steps, you should have a batch of PS regrind that is dry, clean, and homogeneous, making it ready for extrusion testing.
When you're introducing a new material like PS into the Filament Maker for the first time, the stakes are high. The goal isn't necessarily to achieve perfect filament quality right off the bat. Instead, the initial objective is to get an output that, while imperfect, doesn't clog the barrel. This gives you the breathing room to fine-tune the settings over time. Think of this phase as exploratory research, where you're gathering data to refine your process.
One of the biggest questions is how to ensure that the PS melts smoothly during its first run through the Filament Maker. A good rule of thumb is to start with a slightly higher temperature than what you think you'll need. After some quick online research, we found that 210°C is generally on the higher end for most grades of PS. Starting hot is a safer bet than starting too cold, as it reduces the risk of clogging and allows for easier adjustments later on.
When it comes to other settings, it's often best to start with average conditions and adjust from there. For instance, a screw speed of 5 RPM is a good starting point. Through our experience, we've found that a range of 3.0-6.0 RPM is generally effective for producing stable 1.75mm filament with the Filament Maker.
Fan cooling is another crucial parameter, and we usually start with it set at 50%. This is merely a starting point, as fan cooling is the quickest parameter to adjust. It's worth noting that this setting can be influenced by external factors like room temperature and humidity, so keep an eye on those as well.
The first extrusion test is all about learning and adapting. You start with settings that are safe and give you room to maneuver. Then, as you gather more data, you can fine-tune these parameters to get closer to your ideal filament quality. It's an iterative process that combines both art and science, and it's a critical step in mastering the recycling of PS spools.
Transitioning from one material to another in the Filament Maker is a nuanced process that requires a deep understanding of both materials involved. This phase is critical for ensuring a smooth and efficient extrusion process, especially when you're working with complex materials like PS. Let's delve into the intricacies of this crucial step.
One of the unique aspects of the Filament Maker is that its barrel is never truly empty, unless you disassemble the entire system and remove the screw. This is because the feeding mechanism is what generates pressure inside the barrel. The moment the hopper runs out of material, the forward conveyance of the molten material comes to a halt. This sets the stage for what we call "transition," which is the process of pushing out one material by feeding in another.
Transition isn't as simple as just feeding in a new material. Both materials—what's already in the barrel and what you're feeding in—need to have overlapping thermal processing windows. This is because both materials will be melting inside the same barrel simultaneously. At 3devo, we primarily use two purge materials for this purpose: Devoclean MidTemp and HDPE. Both of these materials are compatible with PS due to their wide thermal window, ranging from 190-300°C.
Depending on how you concluded your previous extrusion run, your barrel will most likely be filled with either Devoclean MidTemp or HDPE. The good news is that transitioning from either of these materials to PS can be smoothly done at 210°C. However, transitioning from HDPE tends to be a bit easier compared to Devoclean MidTemp, which is more resilient and takes a bit more effort to flush out.
The actual extrusion process kicks off when you see PS material emerging from the nozzle. This is the moment where all your preparation and transition work pays off, and you can begin to focus on fine-tuning the extrusion parameters for optimal PS filament quality.

Just like the initial extrusion test, the transition phase is also an iterative process. It's about understanding the nuances of material compatibility, thermal windows, and optimal transition temperatures. Mastering this phase is crucial for a seamless and efficient recycling process, especially when dealing with materials like PS.
Troubleshooting is an inevitable part of any experimental process, and filament extrusion is no exception. When you're working with a material as unique as PS, you're bound to encounter some challenges that require a bit of problem-solving. This section is dedicated to helping you navigate those challenges, offering insights into how to fine-tune the extrusion process for optimal results.
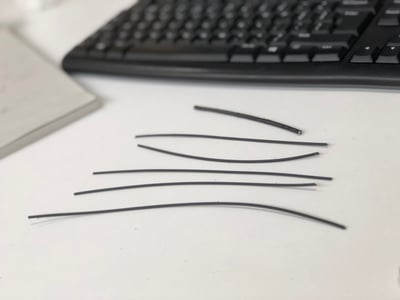
Once the transition phase is complete, which usually takes around 20 minutes, you might find that the first output isn't quite up to snuff for spooling. While the flow may appear stable, fully molten, and free of impurities and bubbles, you could face issues with the extrudate's consistency. Specifically, it might be too liquid when it reaches the puller, causing it to flatten between the wheels. This is a common issue, especially when working with new materials, and it's crucial to address it promptly to avoid further complications.
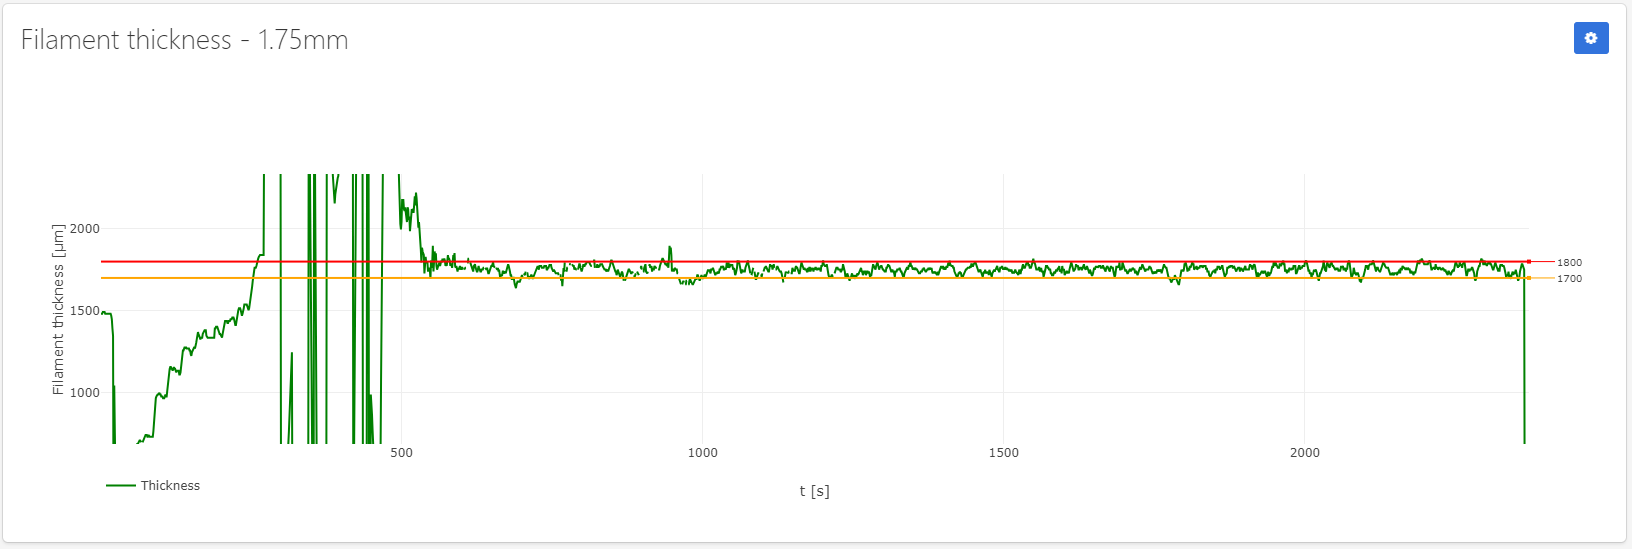
The Filament Maker comes equipped with an optical sensor that plays a crucial role in troubleshooting. This sensor measures the filament's thickness every second and calculates a 20-second average. It then compares this average to the setpoint, which could be 1.75mm, 2.85mm, or any other diameter of your choosing. Based on this comparison, the sensor adjusts the stretching speed and repeats this loop continuously. This real-time feedback mechanism allows for quick adjustments and helps in achieving a stable and consistent filament output.
The primary objective here is to find the optimal extrusion settings with the help of the filament sensor. Because the flow was very stable, the challenge was to ensure that the extrudate was fully solidified before reaching the puller without disturbing the flow or creating instabilities. This is a delicate balance and may require several iterations to get right. But with the real-time data from the filament sensor, you're well-equipped to make these fine adjustments.
By following these troubleshooting steps and understanding the role of each component in the Filament Maker, you should be well on your way to achieving a dry, clean, homogeneous, and fine-enough batch of regrind that's ready for extrusion testing.
Fine-tuning your filament extrusion process is akin to a craftsman perfecting their art. It's not just about getting the machine to work; it's about optimizing every little detail to achieve a masterpiece. In this part, we'll explore how to meticulously fine-tune your Filament Maker settings to produce top-notch PS filament.
Fan speed is a crucial parameter when it comes to filament quality. After several tests, we found that a fan speed of around 100% was optimal for achieving the best quality. This high speed ensures that the filament is adequately cooled as it exits the extruder, contributing to its overall structural integrity.
Screw RPM is another key factor that affects the flow rate and internal pressure of the barrel. We found that slightly reducing the screw speed to 4.5 RPM was beneficial. This adjustment allows the extrudate more time to be cooled by the fans, leading to a more stable and high-quality filament.
Temperature plays a critical role when working with PS. It's essential to maintain high enough temperatures to prevent clogging but not so high that it compromises the filament's quality. We slightly lowered the temperatures by 5°C to 10°C to facilitate easier cooling of the filament. Additionally, we used an ascending thermal profile ranging from 200°C to 210°C to enhance the flow's stability and allow for a gradual build-up of pressure inside the barrel.
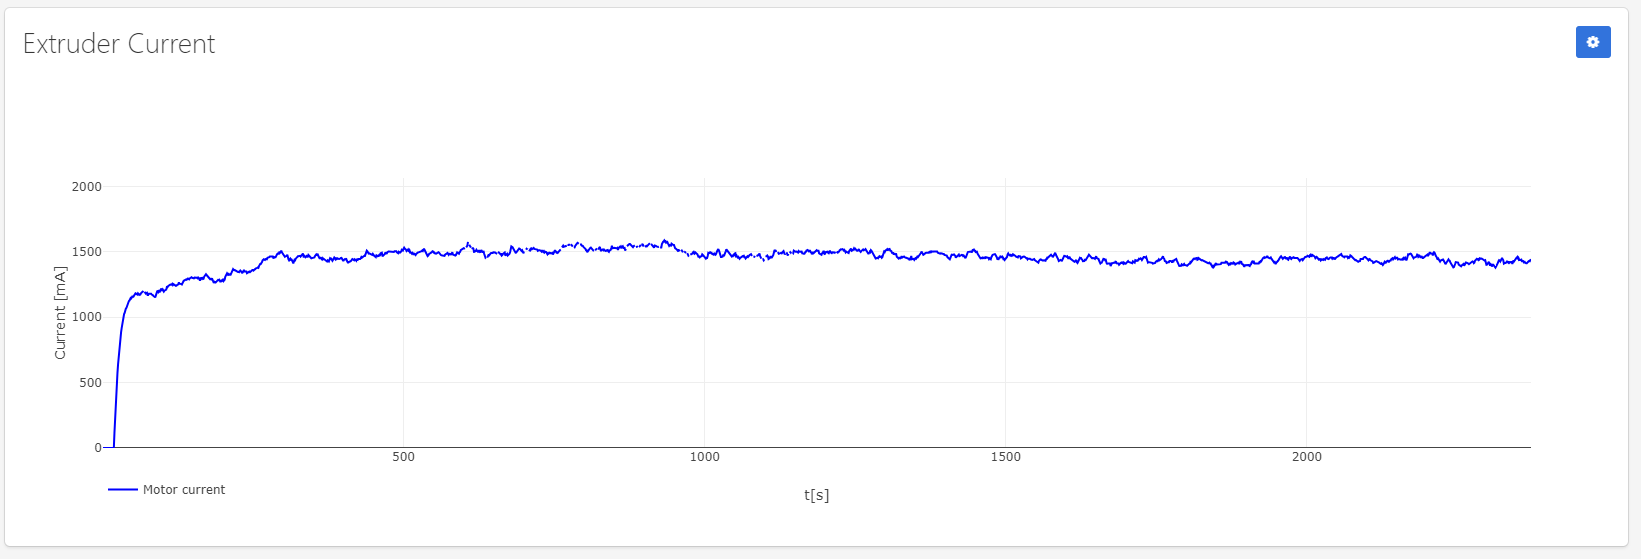
Throughout the fine-tuning process, we closely monitored various parameters using our data-logging software, DevoVision. We paid special attention to the motor current, puller speed, and filament thickness to ensure stability and make quick adjustments as needed.

Once we were confident that the filament quality was stable for over 30 minutes, we initiated the spooling process. This involves following the spooling wizard, manually guiding the filament through the spool's hole, and adjusting the spool tension for a neat, tight wind.
Maintaining your Filament Maker is not just about cleaning and storing; it's about ensuring that the machine performs optimally every time you use it. In this section, we'll guide you through the essential maintenance steps to keep your Filament Maker in top condition.
Purging the Filament Maker at the end of each extrusion session is a non-negotiable step for two primary reasons:
- Contamination Removal: Over time, unmelted particles and contaminants can accumulate inside the barrel. Purging helps to remove these elements, ensuring a cleaner extrusion process in future sessions.
- Polymer Degradation Prevention: When you shut down the extruder, it takes over an hour to cool down to room temperature. Most polymers degrade when exposed to heat for such extended periods. Purging with a transition material like Devoclean MidTemp helps to avoid this degradation, setting the stage for successful extrusions in subsequent sessions.
It's advisable to conduct a standard quality check (QC) on your Filament Maker every month. This involves producing a spool of standard PLA filament using standard settings and pellets. If the machine struggles to produce a perfect spool under these basic conditions, it's an indicator of a deeper, underlying issue that needs attention.
While the Filament Maker is built to last, wear and tear are inevitable over time. For instance, the nozzle may get partially clogged, or the rubber puller wheel might show signs of grooving or roughness. Fortunately, these parts are easily replaceable, ensuring that you can quickly get back to producing high-quality filament.
By adhering to these maintenance practices, you not only extend the lifespan of your Filament Maker but also ensure consistent, high-quality filament production.
3D printing, much like extrusion, is an experimental process that often involves a bit of trial and error. In this final section, we'll share our experiences and insights into achieving optimal 3D print quality using the filament you've just created.
We initially started with "standard" PS printing settings that we found online, which included a printhead temperature of 230°C and a bed temperature of 90°C. However, we encountered an issue with poor bed adhesion.
To tackle the adhesion issue, we took the following steps:
- Temperature Adjustment: We increased the printing temperature to enhance the filament's adhesion to the bed.
- Cooling Shutdown: We turned off all cooling mechanisms to ensure that the filament adhered better to the bed.
- Glue Galore: We applied a generous amount of glue to the build plate to further improve adhesion.
These adjustments were sufficient to successfully print a small, simple item.
The quality of 3D printing can always be refined and improved. The key is to be willing to invest the time and effort into trying out various settings combinations. Don't be afraid to experiment; each trial brings you one step closer to perfecting your 3D print settings.
By following this guide, you'll be well-equipped to navigate the complexities of 3D printing with your newly created filament. Remember, the journey to perfection is iterative, and each step you take brings you closer to achieving your 3D printing goals.
In this comprehensive guide, we've journeyed through the intricate process of converting PS spools into high-quality 3D printing filaments. From the initial steps of preparation and extrusion testing to the nitty-gritty details of fine-tuning and 3D printing, this exploration has been both enlightening and rewarding.
We've learned some important lessons along the way:
- Meticulous Preparation: The importance of thorough preparation to avoid contamination cannot be overstated.
- Material Transition: Understanding and executing material transition is crucial for continuous and smooth extrusion.
- Parameter Fine-Tuning: Adjusting parameters meticulously is essential for achieving optimal filament quality.
- Maintenance and Quality Checks: Regular upkeep and quality assessments are vital for ensuring consistent results over time.
Here are some specific tips to keep in mind:
- Keep the temperature around 205°C for the best filament quality.
- Always purge the machine before and after extrusion. This helps to avoid any contamination or mixing of materials.
- When you're switching materials, make sure to use Devoclean MidTemp. It makes the transition smoother and avoids any issues.
And a few warnings:
- You might need to adjust the fan speed, especially if you're working in a room that's particularly hot or cold.
- If the filament is coming out too soft and getting squished, you'll need to adjust the machine's speed.
- Never leave any PS in the machine when you're done. The only material that should be left in a machine that's not in use is Devoclean MidTemp.
So, what's next? This guide is just the beginning. With some attention to detail and a willingness to get your hands dirty, you can turn everyday PS spools into high-quality 3D printing filament. It's a rewarding process that not only saves money but also opens up new possibilities for 3D printing projects. Keep experimenting, keep refining, and most importantly, keep printing.